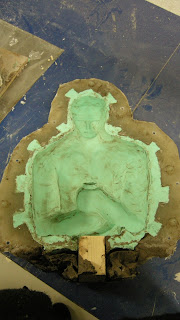
The first step following the molding process was to de-mould. Whilst I took precautions by using a lot of wax release agent on the mould there was always going to be a bit of a fight to get the back sections off due to its unusual shape. Using wooden wedges I began to separate the parts (above and below)
Thankfully it was immediately clear that the front section had come out unscathed with some minor marks and 2 small bubbles (below right). The back GRP sections required a lot of fighting to get them free but eventually they came off. Unfortunately the mechanism housing on the back of the sculpt was damaged but I was fairly sure it could be repaired. In hindsight this whole section really needed to be silicone as well to allow flex in the mould.
The cast came out 90% fine discounting the back damage and small flaws that were in the clay (above). These will be removed with filling and sanding in the coming week. It was great to see the sculpt in place on top of the Pez body (below). For the first time I am able to see just how tall the piece will be and this is not including the base or plinth! The plinth will more than likely be added specifically for the show and won’t count in the submission.
Having attempted to repair the back section of the cast I decided it was too badly damaged to keep in place as it could affect the movement of the mechanism. I cut out the cast section (below left) and fitted an acrylic piece (below right) instead which will be secured in place next week.


No comments:
Post a Comment