Wednesday, 2 March 2011

De-Molding, Casting and Cast Modification


The first step following the molding process was to de-mould. Whilst I took precautions by using a lot of wax release agent on the mould there was always going to be a bit of a fight to get the back sections off due to its unusual shape. Using wooden wedges I began to separate the parts (above and below)


Thankfully it was immediately clear that the front section had come out unscathed with some minor marks and 2 small bubbles (below right). The back GRP sections required a lot of fighting to get them free but eventually they came off. Unfortunately the mechanism housing on the back of the sculpt was damaged but I was fairly sure it could be repaired. In hindsight this whole section really needed to be silicone as well to allow flex in the mould.


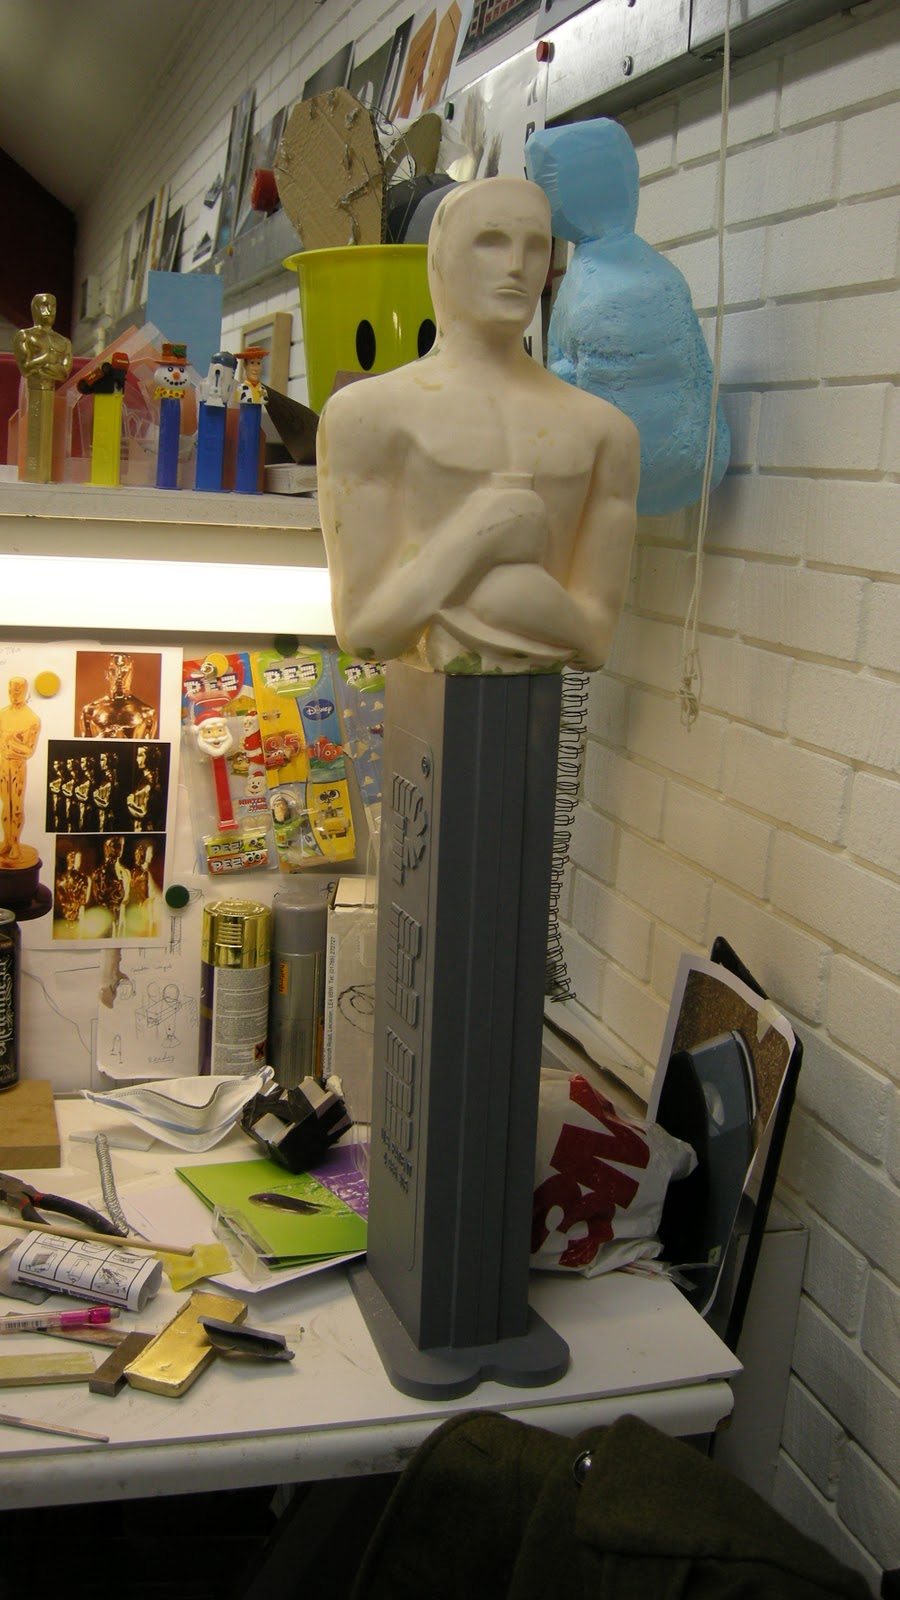
The cast came out 90% fine discounting the back damage and small flaws that were in the clay (above). These will be removed with filling and sanding in the coming week. It was great to see the sculpt in place on top of the Pez body (below). For the first time I am able to see just how tall the piece will be and this is not including the base or plinth! The plinth will more than likely be added specifically for the show and won’t count in the submission.


Having attempted to repair the back section of the cast I decided it was too badly damaged to keep in place as it could affect the movement of the mechanism. I cut out the cast section (below left) and fitted an acrylic piece (below right) instead which will be secured in place next week.

Friday, 25 February 2011

Sculpting issues and Moldmaking


Further Sculpting and re-sculpting has taken a bit longer than I would have liked but has been a learning curve. I knew from the outset that this would be the most difficult part of the project for me as sculpting really doesn’t come naturally. The hard part comes in deciding to 'destroy' parts that appear quite correct but need complete overhaul to really perfect them.


Of particular difficulty were the facial details, especially the mouth. As the photos above show, the mouth changed radically before the point of molding. I must have spent the best part of 2 days working on getting it right. The final mouth may still not be perfect but I felt the overall look (see below) of the sculpt was correct and further modification would have increased my frustration with it and likely affected the quality.


With the sculpt complete I began making the mold. Initially I had discussed making a fiberglass mold that would not require a silicon jacket. However, discussing the subject with Julia in the workshop, we decided it was best if the front was covered in silicon to ensure the slight undercuts and facial detail were preserved in the mold. In order to do this I created a clay wall around the outside of the sculpt and over the head (see below). The cut outs allow silicon to 'key' into the fiberglass jacket at the next stage.


Mixing up the silicon with Thixotropic and Accelerator I was able to apply a good coat to the front of the sculpt (above). Normally this process would be carried out with a layer of silicon (no additives) to ensure that air bubbles escape from the mix. I skipped this layer due to the lack of detail on the sculpt and my easily being able to see which areas were sufficiently covered before applying more silicon. 


I began the fiber glassing process by applying a layer of gel coat across the silicon and over the clay walls (above). This creates a solid layer that will secure the silicon in place during casting. Once tacky (after around 20mins) I began to lay up with fiber glass starting with the thin weave and building up to the thicker (below). All fiber glass was applied using standard polyester lay-up resin.


Once each layer of fiberglass has cured with the resin I added another (approx 3 times) to create a good wall thickness which will be necessary when prising oven the mold (applied fiber glass seen above).


 The back section of the mold presented problems due to its unusual shape. To make it easier to de-mold I split it into two with a wall down the middle (above). Before applying gel-coat I ensured that the exposed fiberglass on the front of the mold was well coated in beeswax and Macwax to act as a barrier between the two. 

Tuesday, 15 February 2011

Clay Sculpting


On Monday I fixed the body guide in place at the front of the armature and began building up clay (above left). Using various photographs of the Oscar award I was able to quickly build up the basic form of the upper part of the sculpt.  This really has been the part of this project I felt would challenge me and I have been surprised at the speed it has come together.


Today I continued to progress by getting tutor opinions as I made progress. The area at the back of the sculpt shows the amount of space taken up by the mechanism (below).


The face sculpt has been unusual as it is difficult to decipher from photographs as they all show different reflections surroundings and light pending. The large scare statues outside the awards venue are much more defined than the actual award which appears smoothed over. I am trying to a few more variations on the face before I am happy.

 
On Paul’s recommendation I took turn around photos which I can now use to measure and draw lines to better understand where the faults are in the sculpt (below).